
drone Membuat Drone QuadCopter Menggunakan Arduino Nano
Step 2: Creating the Body. As I mentioned earlier, the body is a highly personal choice that depends on your needs and tastes. A photography/casual flight drone would benefit from an X/+-shaped body, centralized FC unit, and a stable center of mass, while an FPV racing quad would be more efficient with an H-frame.

10 Langkah Cara Membuat Drone Dengan Mudah Dan Biaya Paling Murah
Halo teman-teman, di tutorial hari ini kita akan belajar cara membuat drone buatan sendiri di rumah dengan bahan yang sederhana dan mudah ditemukan, kita jug.

How to Make a Drone at Home (Quadrocopter) DIY Mini Drone That Flies
5. Taking off and Landing. The most crucial point of flying a drone is taking off and landing. Make sure there is an open area that will allow you to fly the drone in a controlled way. Pick out an area that is free of trees, power lines, and anything that can obstruct your line of site.

Cara Membuat Drone Mudah Dan Sederhana TEKNIK MEKATRONIKA vlr.eng.br
How to make Drone with Arduino | How to make drone at home | DIY Arduino Drone 🟢Programming video -https://youtu.be/fUHg6VeLgSA🛑Download code and schematic.
10 Langkah Cara Membuat Drone Dengan Mudah Dan Biaya Paling Murah
Learn about designing a drone chassis using different materials and manufacturing techniques at the same time. Learn about a Generative Design workflow, starting without a shape. Learn tips and tricks about the algorithm of Generative Design in Fusion 360 to create much durable shapes. Learn about selecting an optimum and desirable tens of shape.

Drone Quadcopter
Nano Drone: 80-100 mm. Micro Drone: 100-150 mm. Small Drone: 150-250 mm. Medium Drone: 250-400 mm. Large Drone: 400+ mm. If you want to make a drone from scratch, selecting the frame size is going to be your first step. Motors. There are two main types of motors: brushed and brushless.

Cara membuat drone sederhana YouTube
DroneDeploy adalah salah satu aplikasi yang di produksi oleh @Dronedeploy·Software company merupakan aplikasi yang banyak di gunakan untuk kegiatan pemetaan.

Cara Membuat Drone Mudah Dan Sederhana TEKNIK MEKATRONIKA vlr.eng.br
Here's a step-by-step guide to help you mount and configure the Arduino: 1. Select an Arduino Board: Choose an Arduino board that suits your needs and is compatible with your drone's components. Popular options include the Arduino Uno, Arduino Nano, or Arduino Mega.
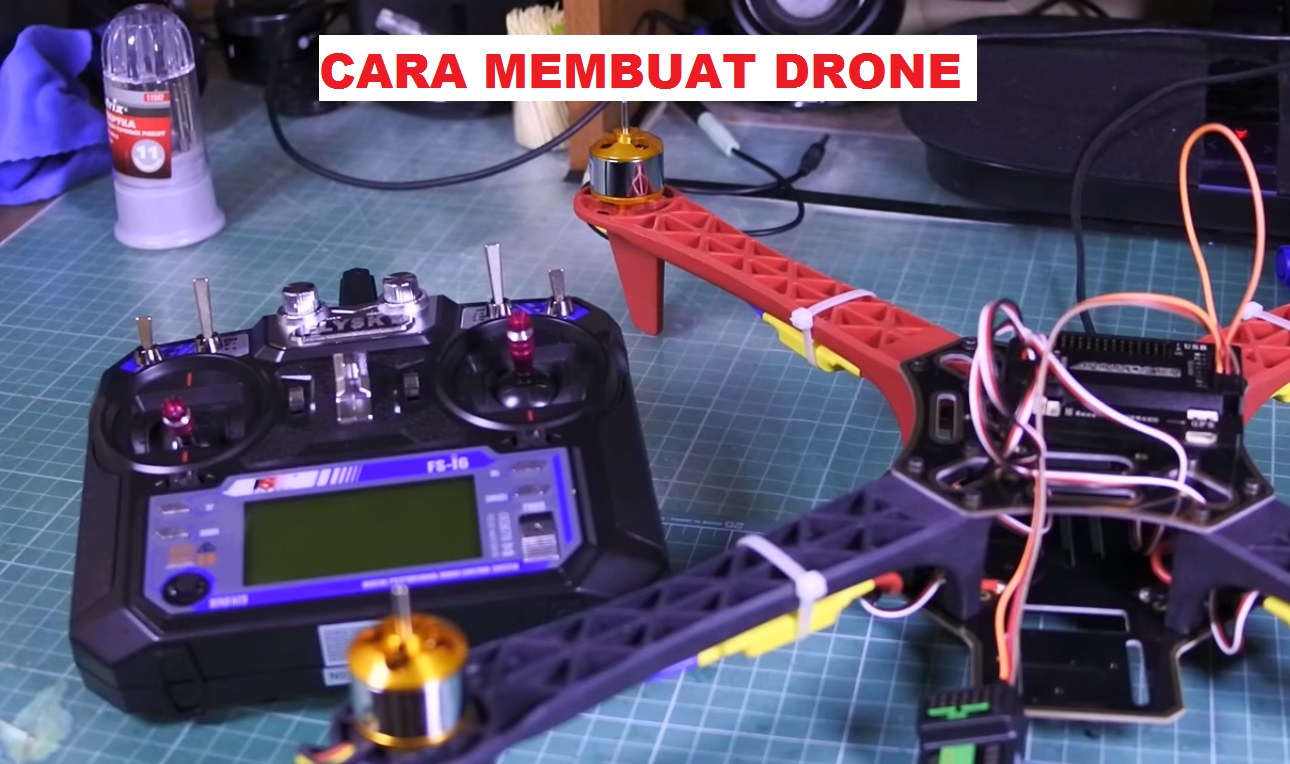
drone Membuat Drone QuadCopter Menggunakan Arduino Nano
Blog by Gulzar, an Indian drone racer and a RC hobbyist. You can find beginner tips and pro-level tips including which components to select for your build in his blog. If you are in a hurry to fly a multirotor, then here is a guide on the best quadcopter under $100. This guide will help you to choose a cheap beginner drone based on your budget.
Cara membuat drone YouTube
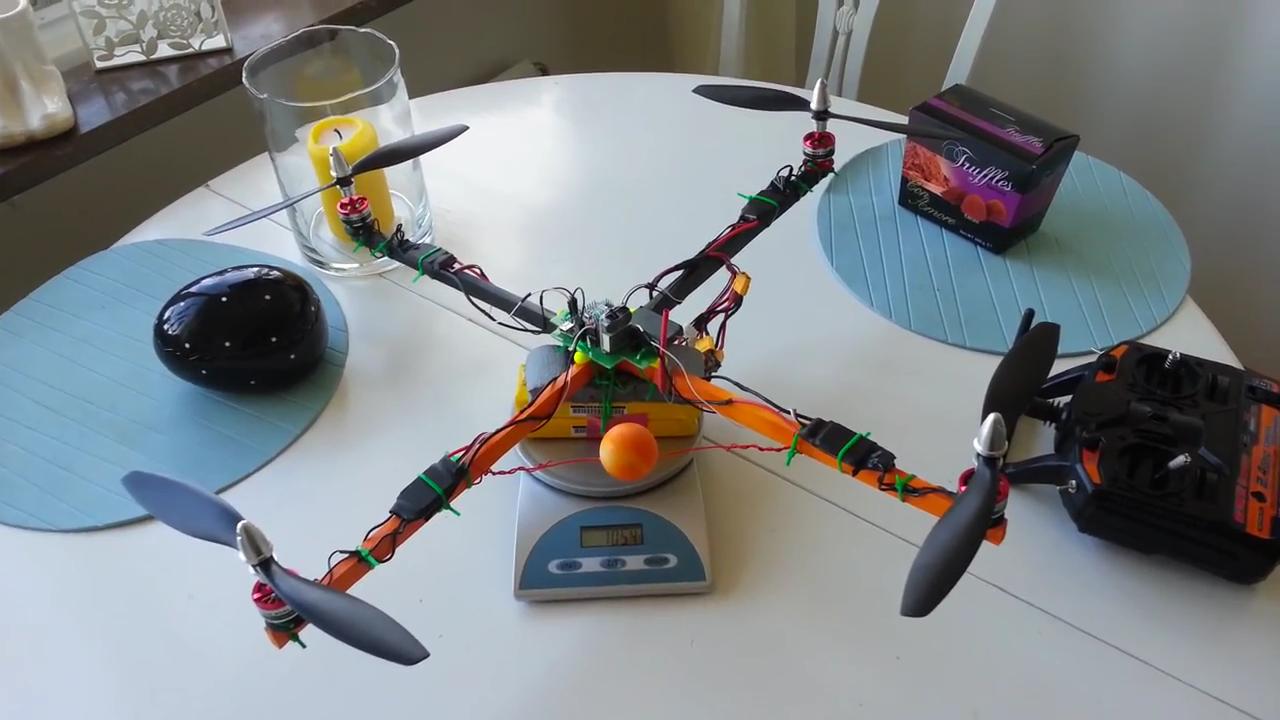
Step 1: Assembling Your Drone. As the first step, you need to build a mini-drone. Get the motors and mount them in the jackets such that the wires are stretched out of the small opening. Get the motors and mount them in the jackets. Now, insert the wires in the arms as shown in the picture.
Cara Membuat Drone Mudah Dan Sederhana TEKNIK MEKATRONIKA
5. Cut 4 .5 in (1.3 cm) rings from a 4 in (10 cm) PVC pipe to make landing gear. Lay the pipe on its side and mark it where you'll make your cut. Then use a saw to cut all four sections, so you're left with 4 plastic rings made of PVC pipe. These four rings will serve as lightweight landing gear for your drone.
Membuat Drone QuadCopter Menggunakan Arduino Nano Omah Drones
Pada tutorial cara membuat drone quadcopter kali ini , kalian bisa membeli motor dengan ukuran 1000 kV , kalian bisa mencarinya dengan mengetikan kalimat "jual brush-less motor 1000kV" di google. maka kalian akan mendapatkan banyak orang yang menjual barang tersebut dengan harga mulai dari 300 ribu sampai 400 ribu untuk 4 buah motor .

TUTORIAL CARA MERAKIT DRONE / FPV RACING DRONE YouTube
Start with the base: Begin by building the base of the frame. Lay out the larger Lego plates or bricks in the desired shape and attach them securely to each other. This will create a solid foundation for the rest of the frame. Construct the arms: Extend from the base and build the arms of the frame.

Cara membuat drone rakitan dengan mudah YouTube
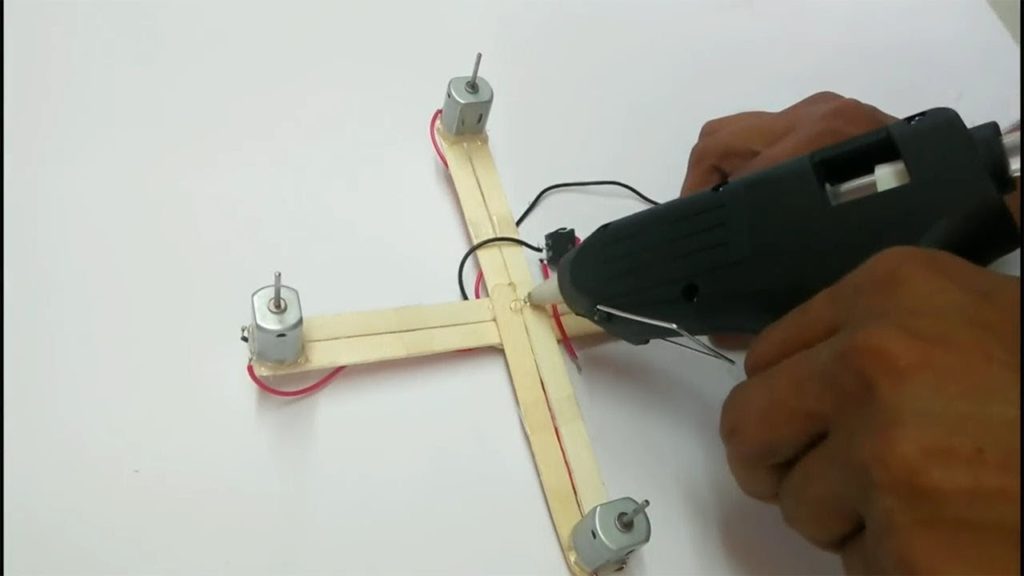
Step 1: Making the Frame. No matter what your drone is going to be, it must have a frame. So, the first task is to make a frame. For this purpose, you can use different materials, such as metal, plastic, or wood. These materials will differ based on how sturdy you intend the drone to be.

Cara Membuat Drone Rakitan Dengan Mudah vlr.eng.br
1. Uji Terbang di Area Terbuka dan Aman. Setelah berhasil merakit drone, lakukan uji terbang di area yang terbuka dan aman. Pastikan drone berada pada jarak yang cukup jauh dari orang atau bangunan. Lakukan penerbangan dengan hati-hati dan kontrol secara perlahan untuk menghindari crash atau kerusakan pada drone.

Build your own Drone using KK2.1.5 Flight Controller From Selecting
Make sure the drone is threaded onto the guide poles. Place the ultrasonic sensor directly under the drone, facing up (Figure 7). Re-connect the drone's wire to the breadboard. Press the push button once to make the drone lift off. Adjust the potentiometer to change the drone's height.
