
Diy Drone Kit Arduino Arduino Project Hub I wanted to make an
The Best Arduino Drones & Quadcopters for 2024. by Cherie Tan, Aftab Ali. Updated Dec 28, 2023. Ready to up your game and build your own Arduino drone or quadcopter? Here are some cool DIY projects to get off the ground!
Membuat Drone QuadCopter Menggunakan Arduino Nano Omah Drones
The Arduino development board is ideal for this purpose, even more so as there is a wide variety of models, from the tiny Arduino Nano to the beefier Arduino Mega, all portable enough for a drone's design. In this article, we'll explore some of the most impressive drones created with an Arduino. 1. The Drone Pi
Build a Multiwii drone from scratch full tutorial Arduino
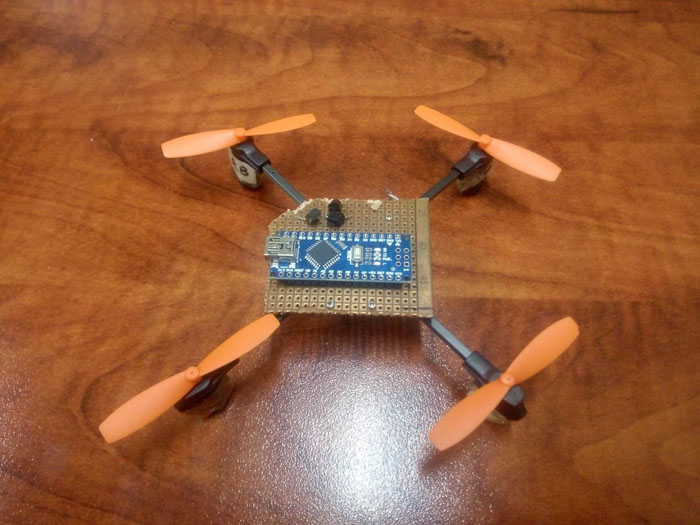
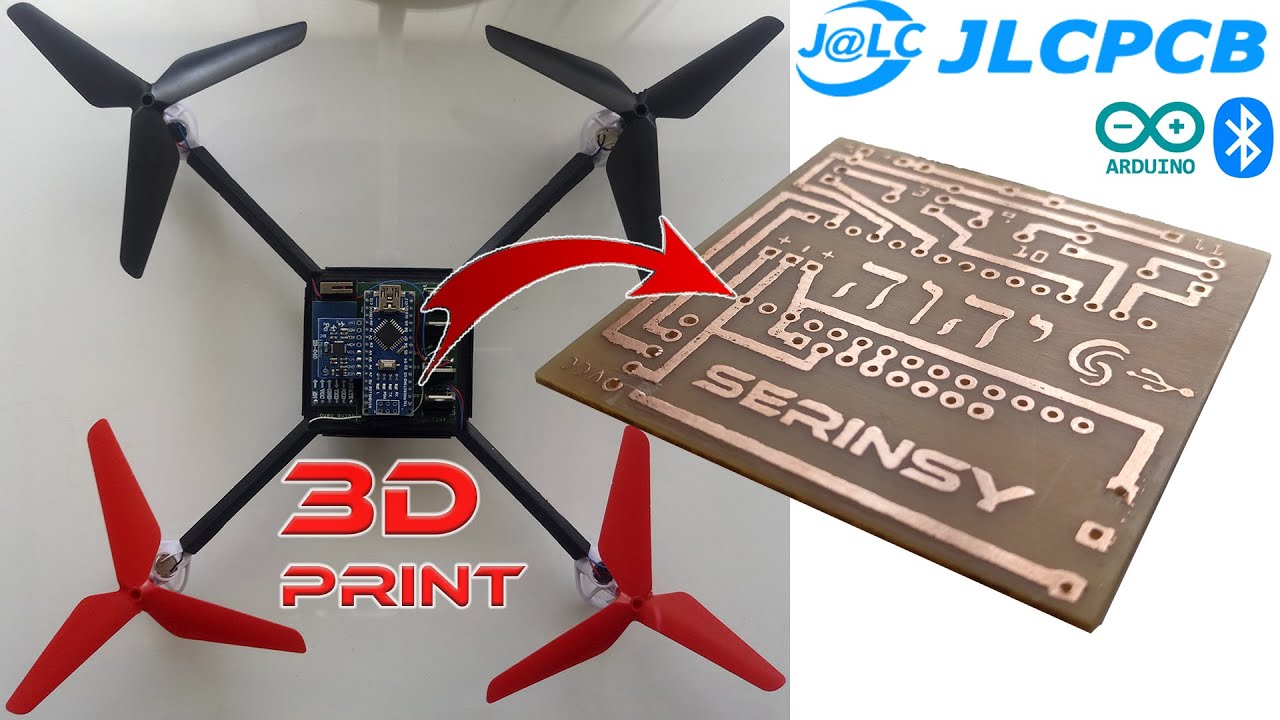
Arduino Nano Quadcopter : (At the moment the project is being edited as the previous model had a couple of flaws) This is Arduino based and 3D printed nano quadcopter which flies on DC brushed motors.. However barometer are best used for drones which are used outside due to not being super accurate. On top of that pressure changes in time.
Arduino drone with brushed DC coreless motors nano drone
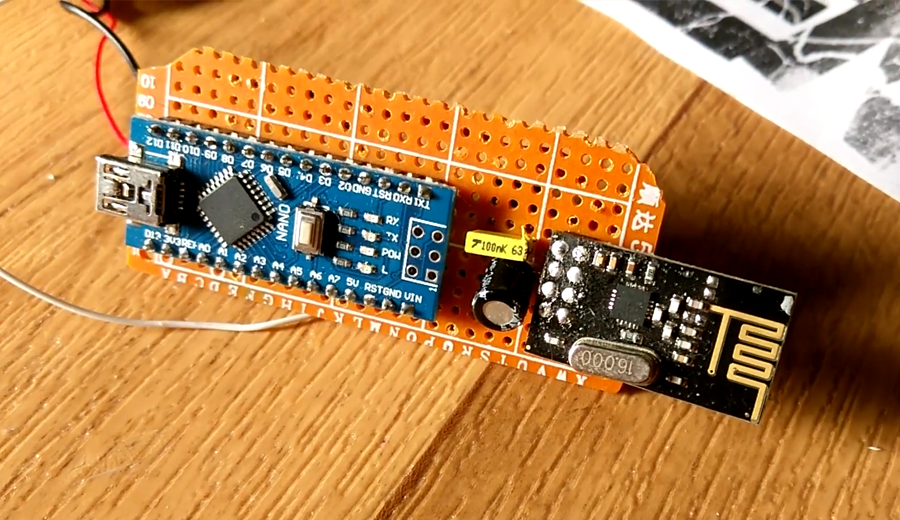
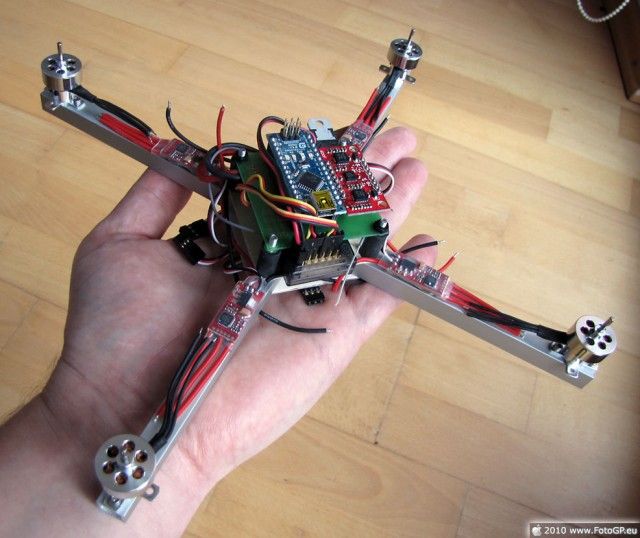
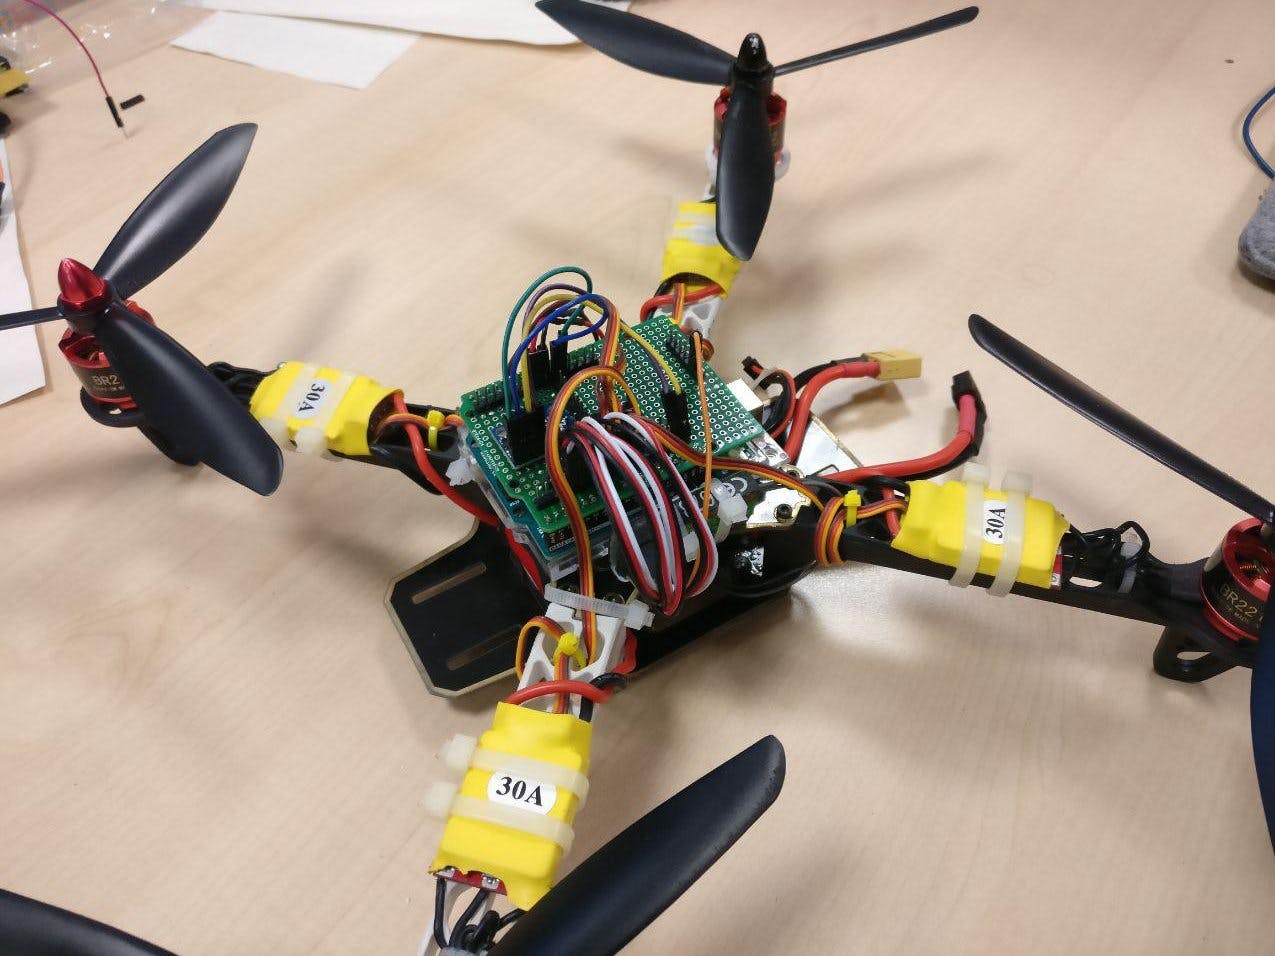
This project is to create a versatile yet custom multicopter drone logic-board based on Arduino and Multiwii. Step 1: Hardware An Arduino Nano was utilized for processing logic and a MPU-6050 was implemented for gyroscope and accelerometer input.
Build Arduino Quadcopter with Complete Source Code and Circuit Diagram
You need to connect the motors to the ESCs, and ESCs to the battery. You can use a four-way connector (power distribution board) for this, like in the following diagram: Now, connect the radio to the Arduino Nano with the following pin configuration: Arduino pin. Radio pin. D3. CH1. D5.
Assemble DIY selfie drone with Arduino and ESP8266 Packt Hub
The Nano family has grown considerably since the first Arduino Nano was released in 2008. With the addition of the new Arduino Nano ESP32 board, there are now seven Nano boards: The original Arduino Nano - This board is a 5-volt logic device based around an ATMega328 microcontroller. It's essentially an Arduino Uno R3 with two additional.
Building DIY Drone from Scratch Part 2 Using Arduino Nano as Flight
Make sure the drone is threaded onto the guide poles. Place the ultrasonic sensor directly under the drone, facing up (Figure 7). Re-connect the drone's wire to the breadboard. Press the push button once to make the drone lift off. Adjust the potentiometer to change the drone's height.
DiY Arduino Drone r/arduino
Complete Course. There are two main stages of building an arduino quadcopter: putting the hardware together and coding the flight control software. Think of the hardware as the bones, and the software as the brains. One of the best resources available for assembling the 'bones' and coding the brains for an arduino-copter is Mr. Joop Brooking.
Como programar un drone con arduino Actualizado enero 2024
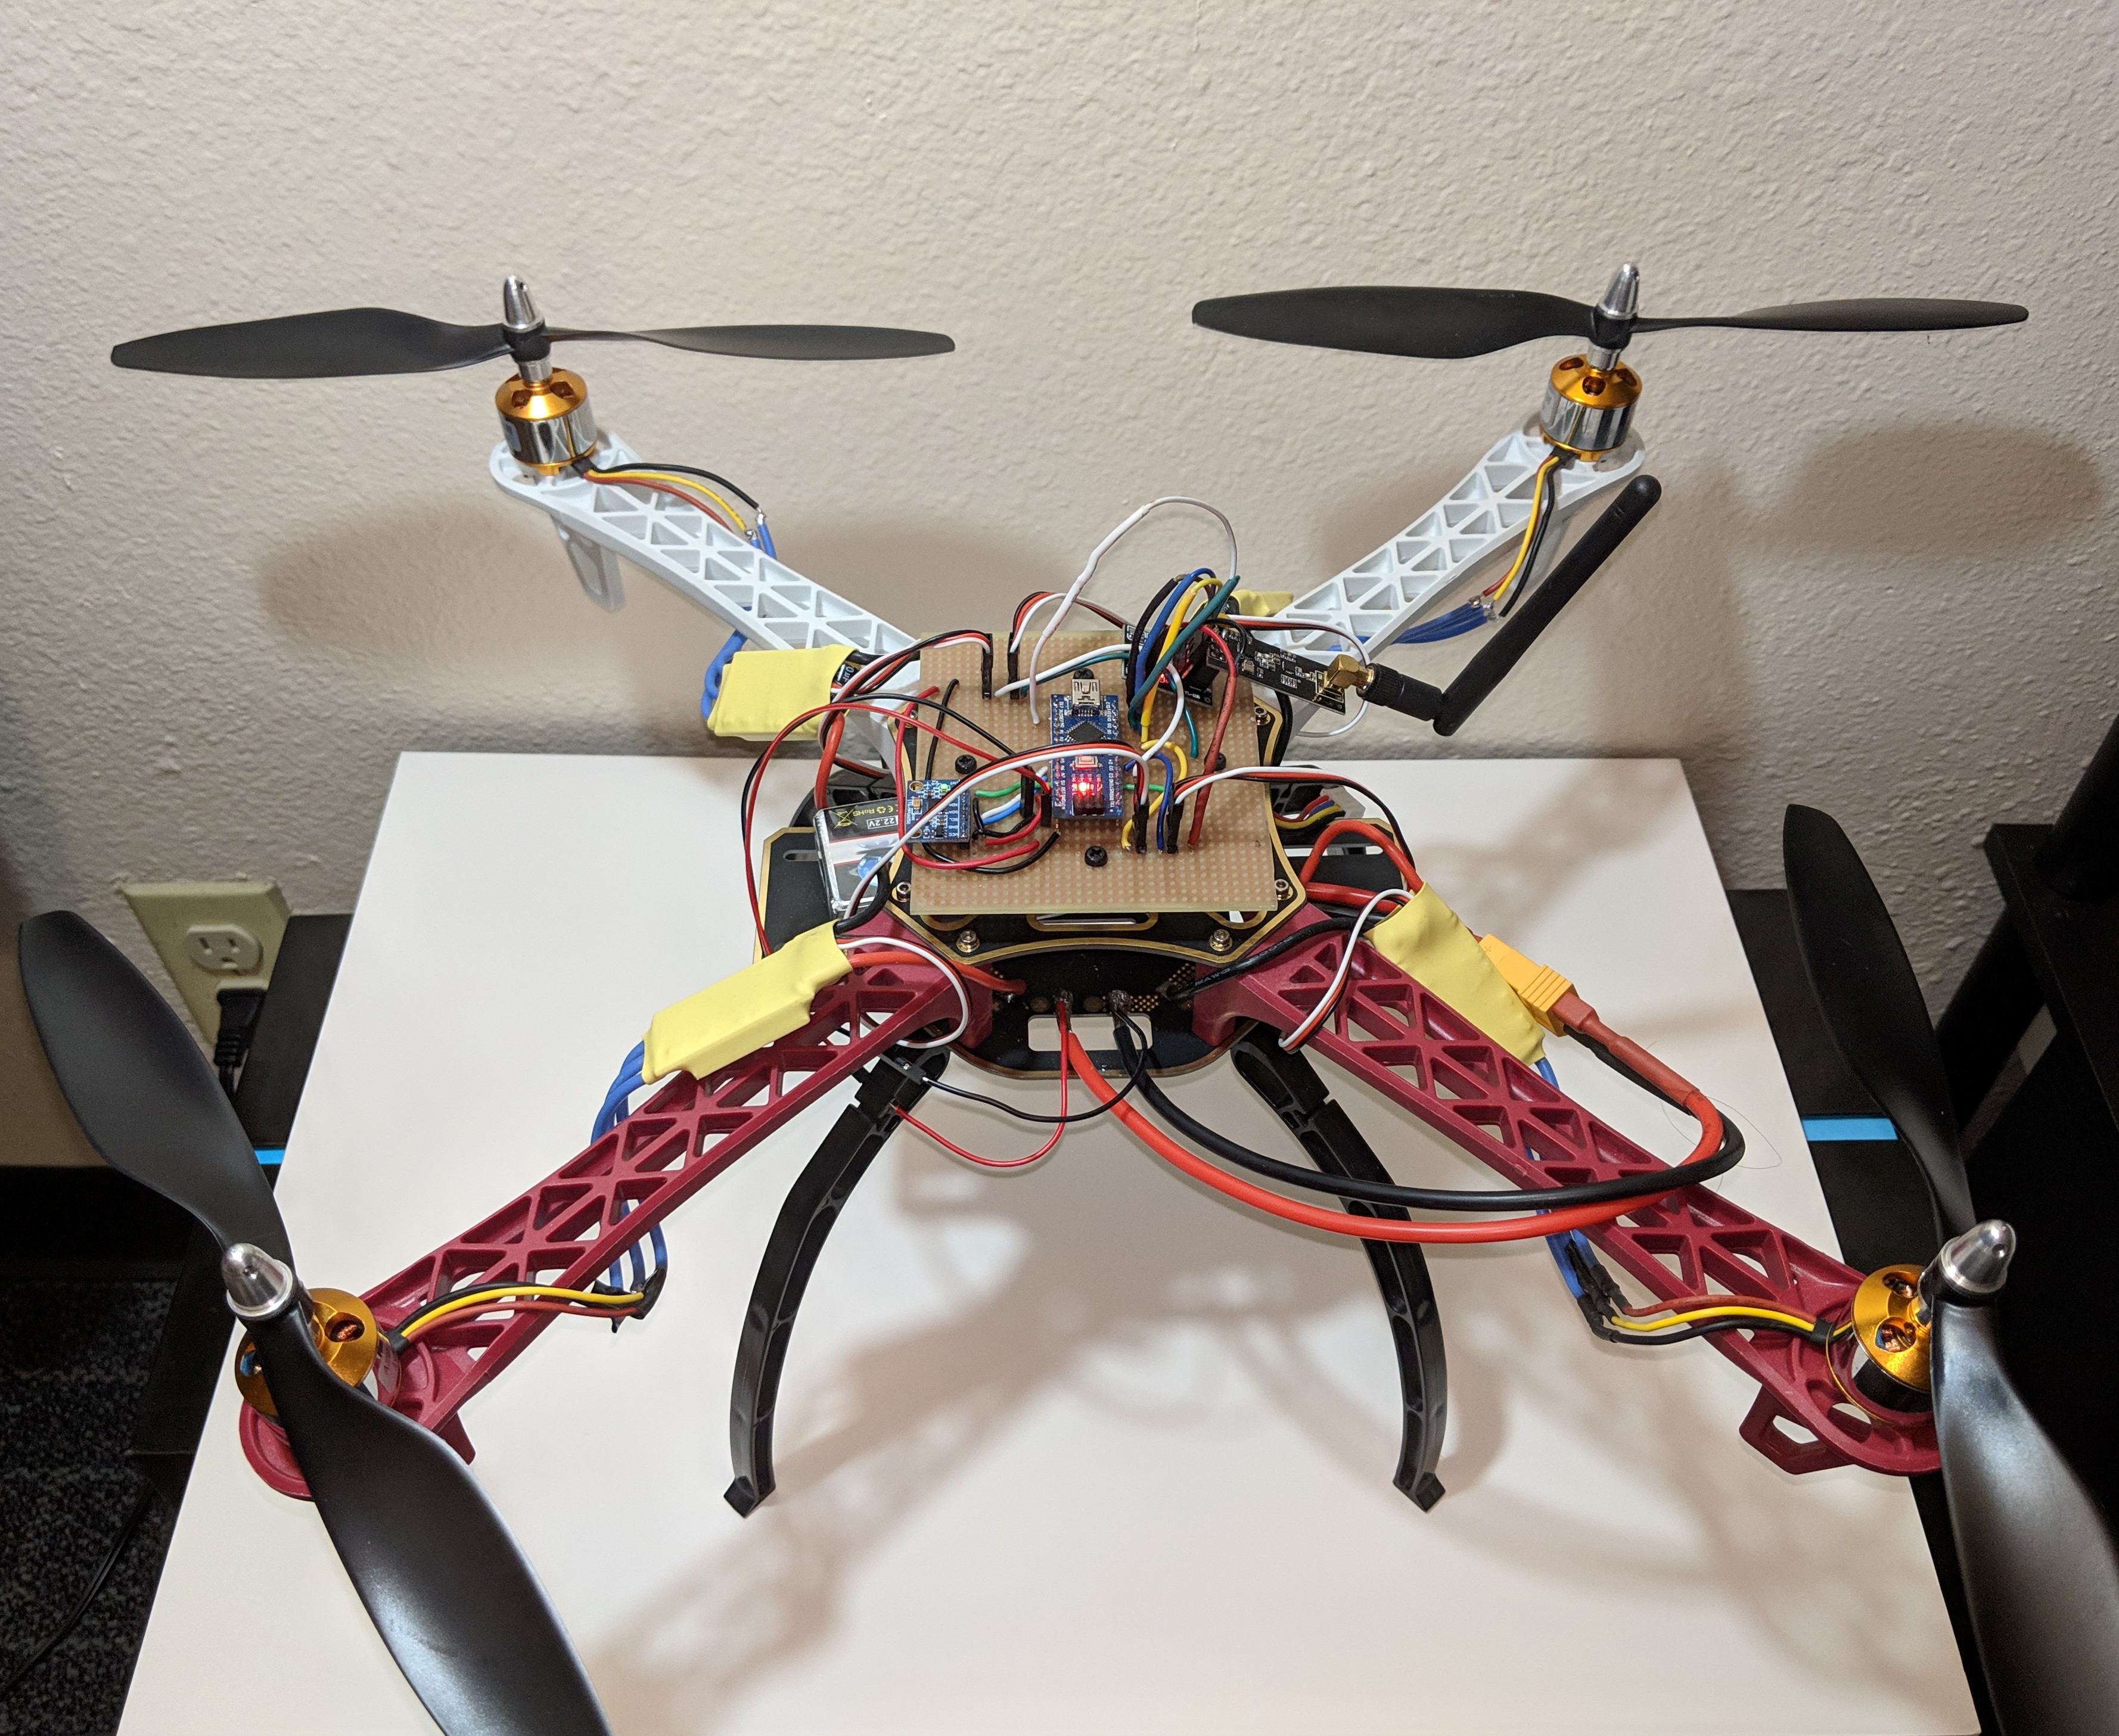
This is the third and final part of our Arduino-based Drone Series. In the first part, we made a flight controller for our drone using the Arduino Nano and MPU6050 module. In the second part, we made an Arduino-based Remote Controller Pair to control our drone. Now in this final part of our drone series, we are going to assemble the frame of.

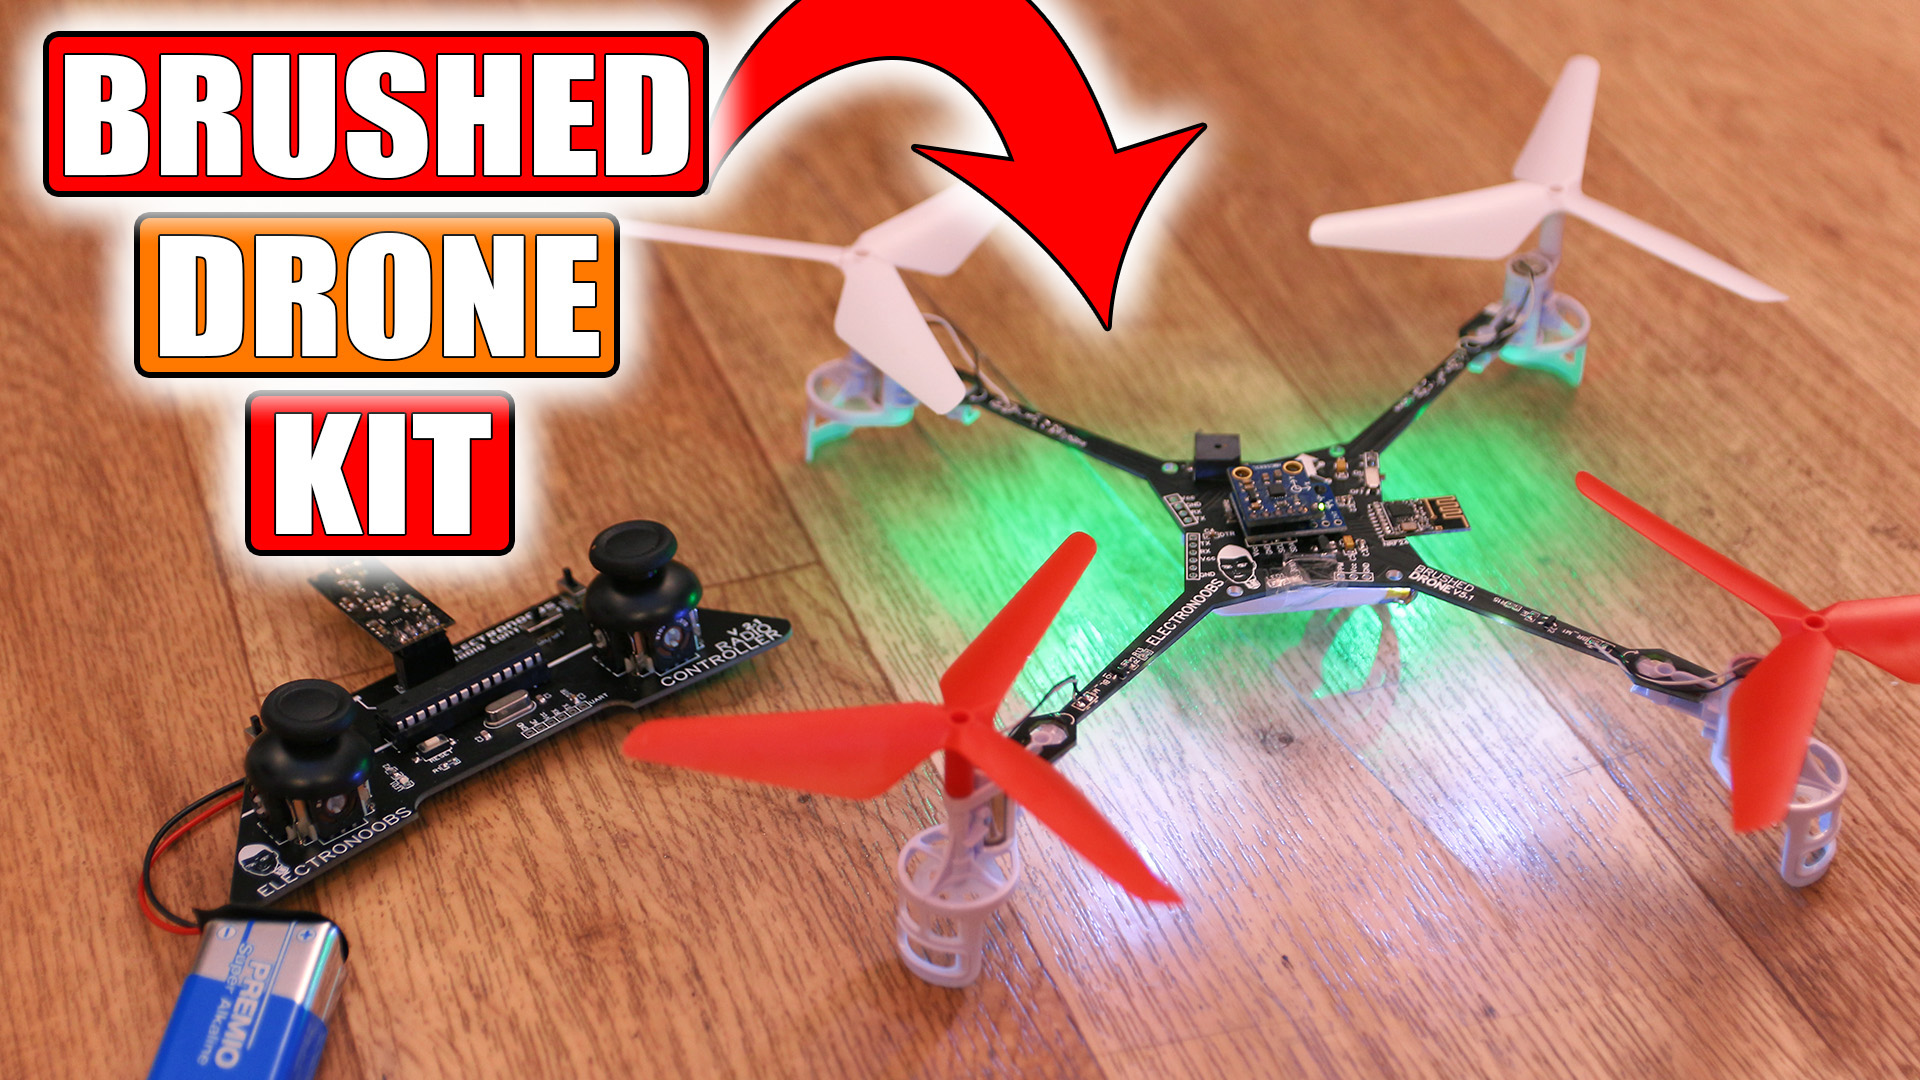
Brushed Arduino Drone Final Version (KIT format) YouTube
Now for building the Flight Controller, you need to follow the steps given below:-. First of all, we need to connect our MPU6050 Sensor to our Arduino Nano. These should be connected as given below:-. VCC pin of MPU6050 to 5V pin of the Arduino Nano. GND pin of MPU6050 to GND pin of the Arduino Nano.
Drone Arduino Nano 3D ️ YouTube
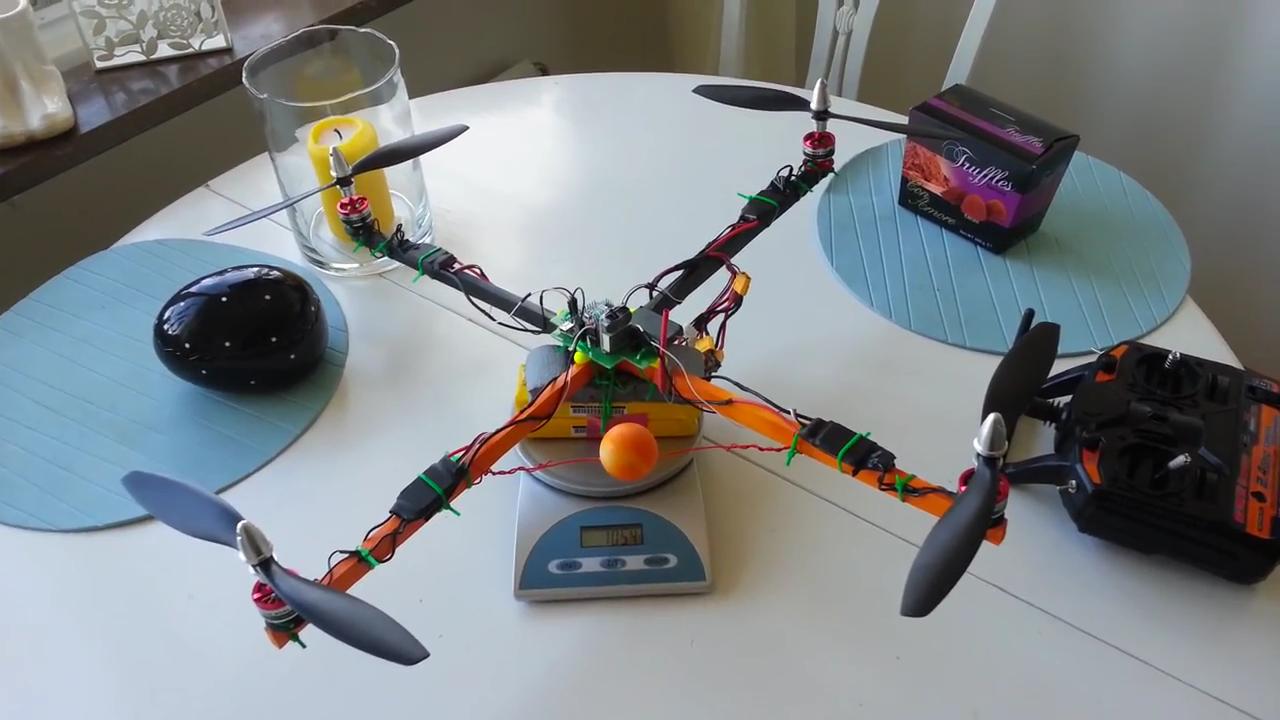
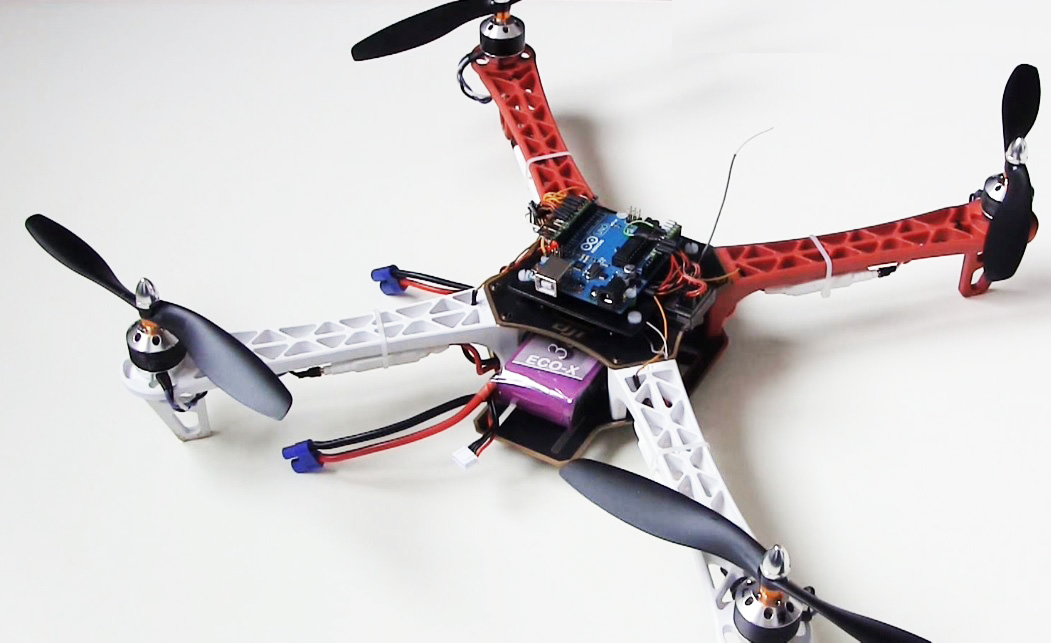
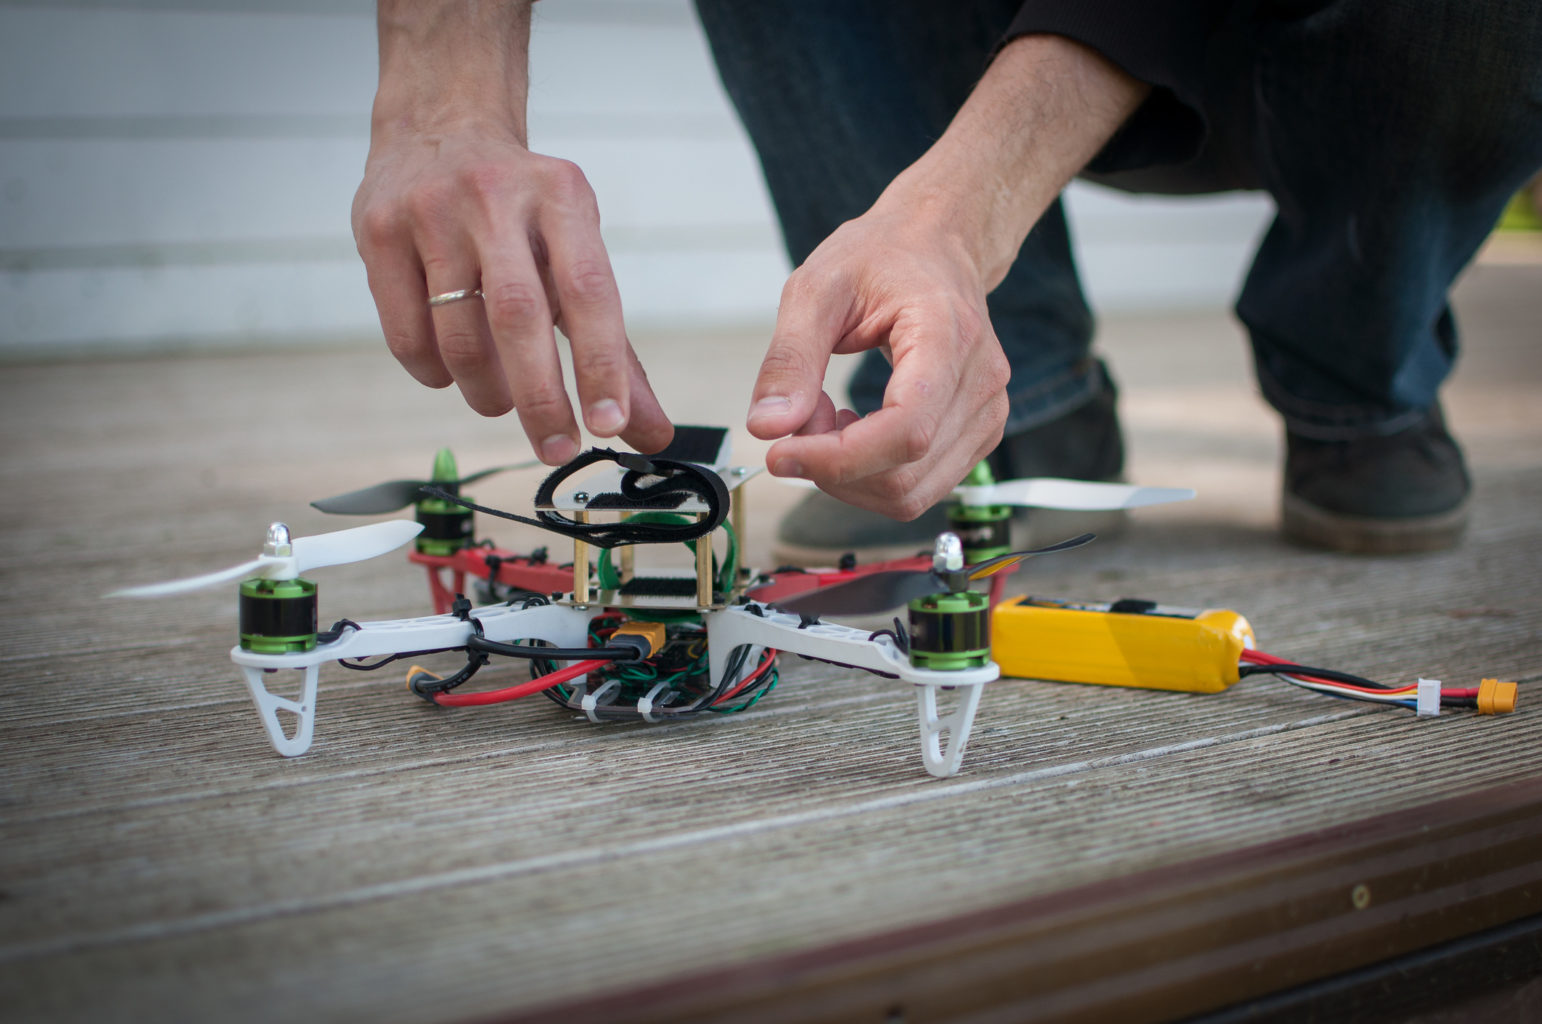
Step 6: Adding the Flight Controller and the Battery. Now assemble our home made flight controller (arduino receiver) to the center of the drone frame. It is recommended to put a small piece of sponge on the underside of the flight controller because it absorbs and reduces the vibrations from the motors.
PhaseMod Drone Synth (w/ Arduino Nano & Mozzi) Arduino Project Hub
Here's a step-by-step guide to help you mount and configure the Arduino: 1. Select an Arduino Board: Choose an Arduino board that suits your needs and is compatible with your drone's components. Popular options include the Arduino Uno, Arduino Nano, or Arduino Mega.

Arduino Nano Quadcopter 8 Steps Instructables
The Arduino Nano 33 IoT includes an LSM6DS3 Inertial Measurement Unit or IMU. This IMU features a 3D digital accelerometer and a 3D digital gyroscope, and the associated library makes it very easy to work with. The LSM6DS3 is an I2C device, and internally it is connected to the same I2C bus used on pins A4 and A5.
The Arduino Drone Sean Eaton
Step 9: Set Up GPS Data Reception. Wire up your second Arduino with your second HC-12 transceiver as show in the above schematic, keeping in mind that the setup will only be powered as displayed if plugged into a computer. Download the provided transceiver code, open your serial monitor to 9600 baud.

DIY Arduino based Quadcopter Drone Arduino Project Hub
Arduino Flight Controller for Quadcopter - MultiwiiIn this video, I used an Arduino Nano along with the GY-521 Accelerometer+Gyroscope to Build a Flight Cont.
Arduino Drone Hackster.io
The drone frame is 20 cm large and propeller radius is 6.5 cm. The total mass is 130g, the 2x3.7V batteries included. It is powered by four DC brushed motors. The core of the drone is an Arduino Nano, connected to: a HC12 radio transmitter to receive commands from the remote control. a MPU6050 accelerometer to measure the drone state.