How to install ESP8266/NODEMCU support to Arduino IDE Robo India Tutorials Learn Arduino
Install ESP8266 Add-on in Arduino IDE . To install the ESP8266 board in your Arduino IDE, follow these next instructions:. You can use the Arduino IDE, if you follow this tutorial will overwrite the NodeMCU firmware with the Arduino IDE blink sketch. Reply. Adeeb. October 31, 2016 at 8:34 am Thank you very much for this tutorial.
Cara Install Board Nodemcu Pada Arduino Ide Bdxtronix Vrogue
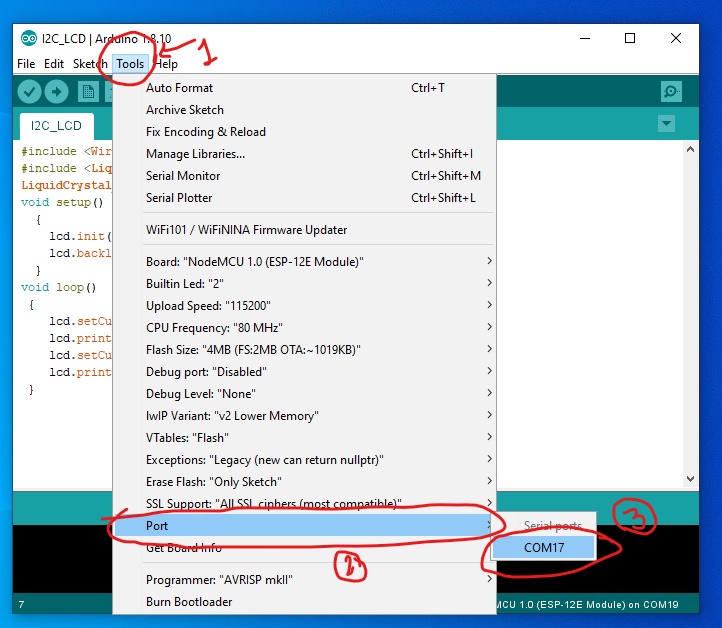
To install the ESP8266 board in your Arduino IDE 2, follow these next instructions: 1. In the Arduino IDE 2, go to File > Preferences. 2. Copy and paste the following line to the Additional Boards Manager URLs field. Note: if you already have the ESP32 boards URL, you can separate the URLs with a comma, as follows: 3.

Cara Install Board ESP8266/NodeMCU di Arduino IDE Mahir Elektro
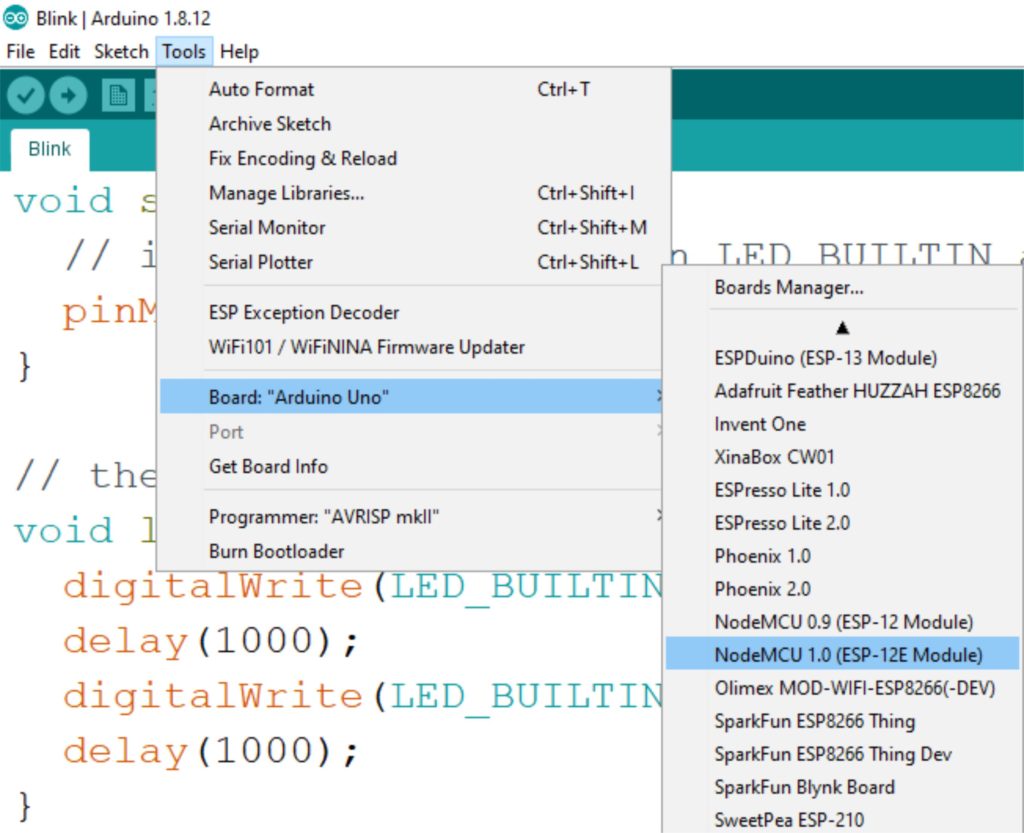
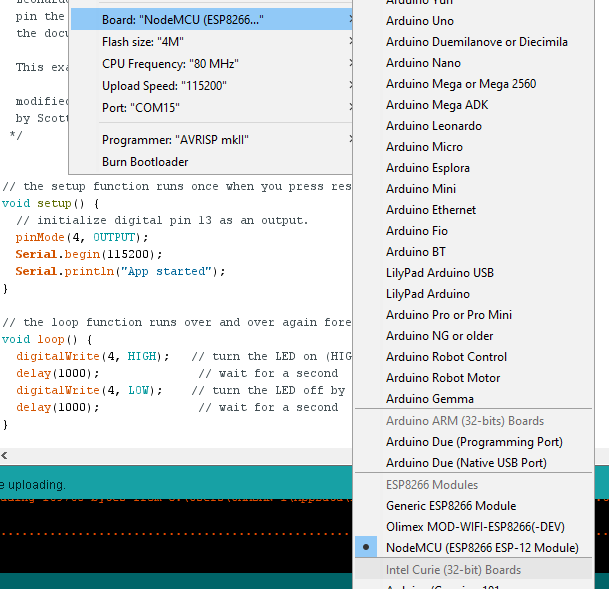
Install Board NodeMCU. After the download and install board process is complete, it is ready for the NodeMCU to be programmed with Arduino IDE which the words marked: Installed on the ESP8266 board list. Testing Program Blink LED. To make sure everything goes well, then we do a simple program test that is Blink LED. Choose Board NodeMCU by.

NodeMCU I2C with Arduino IDE ElectronicWings
We will see how to use the Arduino IDE to program a NodeMCU. The way to configure the Arduino IDE is similar between these different boards. We will see in this article the procedure to configure and program a NodeMCU ESP32. Install the drivers on the computer. Usually, a new device installs its drivers at the first connection.
How to Install & Configure NodeMCU ESP8266 Board on Arduino IDE Software YouTube
Example code for Blinking Inbuilt LED of NODEMCU. 1 void setup() { 2 // initialize inbuilt LED pin as an output. 3 pinMode(LED_BUILTIN, OUTPUT); 4 } 5 6 // loop function runs over and over again forever 7 void loop() { 8 digitalWrite(LED_BUILTIN, HIGH); // turn the LED on by making the pin 13 HIGH 9 delay(500); // wait for a 0.5 second 10.

TUTORIAL DASAR NodeMCU LOLIN ESP8266 V3 CH340 (Menambahkan Board ESP8266 & Setting IDE Arduino
Ketika kamu pertama Install Arduino IDE tidak akan langsung ada pilihan Board ESP8266 di menu Tools => Board. Melainkan harus kita add sendiri ke Arduino IDE nya. Tujuan kita pasang board ESP8266 adalah supaya board yang support WIFI ESP8266 seperti NodeMCU, Wemos, dan sebagainya bisa kita Program di Arduino IDE. CARA PERTAMA Ada 2 Cara […]
Programming ESP/NODEMCU with Arduino IDE Arduino Maker Pro
Dokumentasi resmi : https://arduino-esp8266.readthedocs.io/en/latest/installing.htmlURL yang dimasukkan ke preference : https://arduino.esp8266.com/stable/pa.
Using NodeMCU with Arduino IDE iCircuit
We've done the hard work of figuring out the NodeMCU drivers and NodeMCU Arduino IDE setup for you. Read on for the two steps that have to be done only once. More helpful info at the end, too. Installing NodeMCU drivers for USB. This part of the instructions are written for Windows. They're very similar for OSX and Linux.

Cara Menginstal Library NodeMCU ESP8266 ke Arduino IDE Mr Leong
NodeMCU is a low-cost, open-source IoT platform based on ESP8266. In this guide, you will learn how to write and upload sketch for NodeMCU using Arduino IDE, a popular and easy-to-use development environment. You will also learn how to connect NodeMCU to your computer and configure the settings for Arduino IDE.
Get Started With Arduino Ide And Esp8266 Nodemcu Reverasite
Board yang menggunakan chip ESP8266 seperti NodeMCU tidak secara langsung didukung oleh Arduino, sehingga kita perlu memasangnya secara manual. Kita bisa menginstall board ESP8266 menggunakan board manager yang tersedia pada Arduino IDE. Di sini saya akan memberikan petunjuk bagaimana cara install board berbasis ESP8266 pada Arduino IDE.
NodeMCU Arduino Setup ESP8266 Arduino IDE Setup Techatronic
Cara Pertama Menginstall Library ESP8266 Secara Online. Untuk cara yang pertama ini yang sobat butuhkan adalah koneksi internet yang stabil dikarenakan proses penginstalan library dari NodeMCU akan dilakukan secara Online sehigga semua file yang diperlukan akan di download langsung dari Server NodeMCU ESP8266.. Oke langsung saja pertama - tama sobat buka Arduino IDE milik sobat lalu pilih.

Cara Install Board Nodemcu Pada Arduino Ide Bdxtronix Vrogue
NodeMcu adalah suatu board yang spesial, karena tidak otomatis terinstal pada aplikasi arduino ide. Kita harus menambahkan sendiri secara manual board arduino. Tetapi tenang saja disini saya akan bagikan tutorial untuk sobat kece cara menambahkan Board NodeMcu ESP 8266 Pada arduino Ide dengan mudah. bisa saya bilang sangat mudah
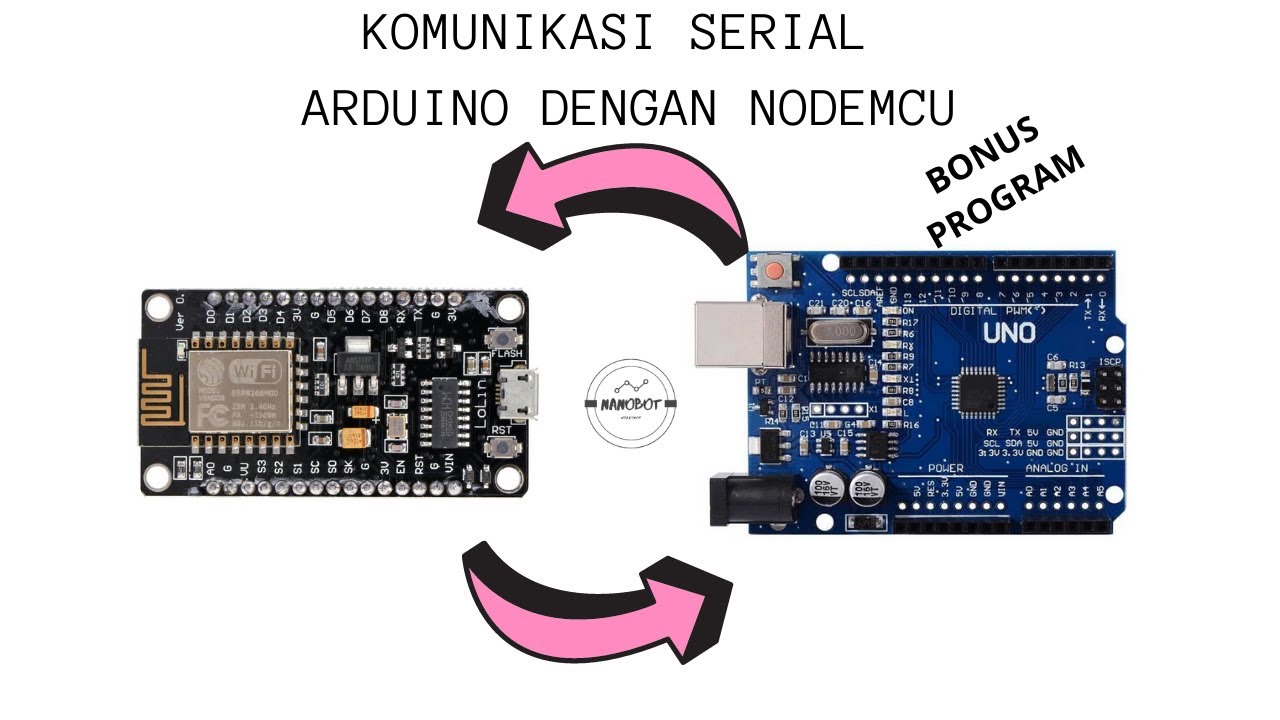
Cara menghubungkan Arduino dengan Nodemcu menggunakan komunikasi serial (BONUS PROGRAM SIAP
Assalamu'alaykum, Semangat Pagi sahabat. Pada halaman ini kita akan membahas cara install NodeMCU & Wemos (Board yang berbasis ESP8266) pada Arduino IDE. Bahan-bahan yang harus disiapkan : Software Arduino IDE yang sudah diinstall (Jika belum install, silahkan download Arduino IDE di sini dan install) Driver CH340 (Download di sini dan install)
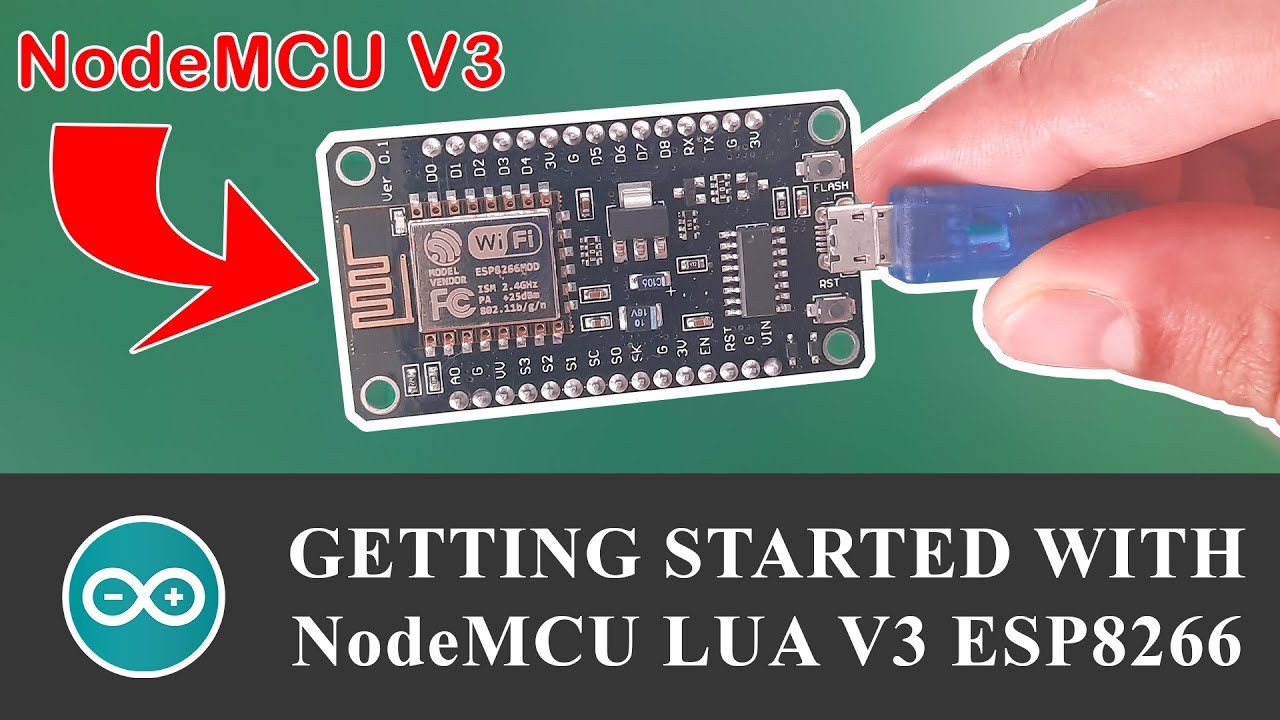
How to Add and Use NodeMCU V3 with Arduino IDE Getting Started ESP8266 YouTube
NodeMCU adalah sebuah mikrokonterler yang hampir mirip dengan arduino tetapi NodeMCU sudah memiliki WiFi tersendiri, sedangkan untuk memprogramnnya bisa meng.
Cara Install Board Nodemcu Pada Arduino Ide Bdxtronix Vrogue
Open Arduino IDE. Click the File menu > Preferences. Look for the Additional Boards Manager URLs form. Paste the copied link into the form then click OK. Click the Tools menu > Board > Board Managers. Search with the word " ESP " > Select ESP8266 by ESP8266 Community. Click Install. This takes a relatively longer time, please wait.

Cara Install Board ESP8266/NodeMCU di Arduino IDE Mahir Elektro
Software Arduino IDE yang sudah diinstall, cara untuk install software arduino bisa dilihat disini. untuk memastikan bahwa kita berhasil menambahkan board nodemcu di arduino ide, kita bisa mencoba mengupload coding berikut ini ke nodemcu, pastikan upload speednya 115200 ya; void setup() { pinMode(LED_BUILTIN, OUTPUT); // Initialize the LED.
